• Responding to email notices you receive.
    **************************************************
    In short, DON'T! Email notices are to ONLY alert you of a reply to your private message or your ad on this site. Replying to the email just wastes your time as it goes NOWHERE, and probably pisses off the person you thought you replied to when they think you just ignored them. So instead of complaining to me about your messages not being replied to from this site via email, please READ that email notice that plainly states what you need to do in order to reply to who you are trying to converse with.

  • IMPORTANT! PLEASE READ!! About the Google Adsense ads being displayed

    =====================
    Posted 08/15/2025
    =====================


    Yeah, I know. They are a pain in the butt. But they pay the bills to keep my server running. Just a fact of life, I am afraid.

    Want to get rid of them? Simple. Just become a Contributor level member or above and they will be gone. -> Please click HERE."

    Is that too much for me to ask of you to keep this site running? Well, sorry about that. I too wish I could get everything for free. But alas.....

    =====================
    Addendum: 01/10/2026
    =====================


    Google Adsense ad revenue for December, 2025 was just $30 over the cost of the lease for the server running this site. So, in effect, the money providing the incentive for me to continue running this site is coming SOLELY from the paid memberships and sponsorships here. Which honestly ain't much....

new frog set up

mikepanzarella

New member
Joined
Sep 18, 2011
Messages
434
Reaction score
16
Points
0
Location
long island ny
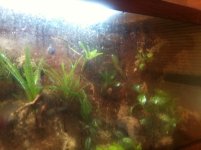
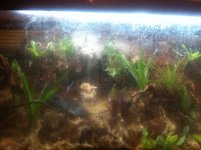
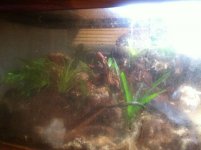
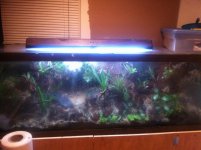
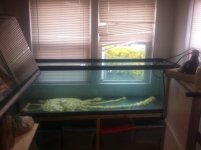
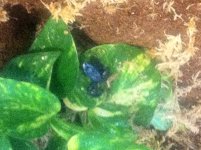
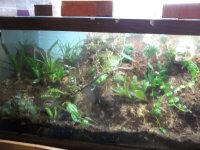
this was alot of fun and the 2nd tank ive built its a 125gal tank all live plants (still need to add more )
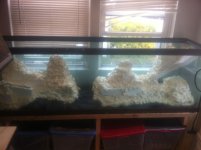
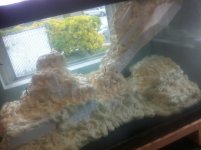
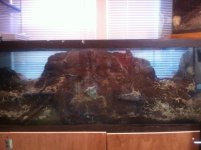
to build we started by using foam boards held by toothpicks then they were spray foamed over we then used coco husk to cover the foam and added some moss
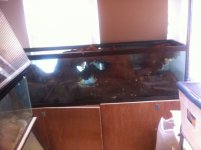
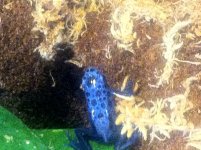
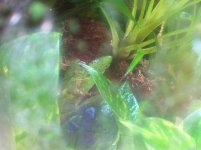
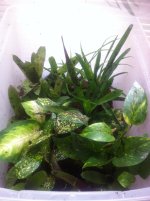
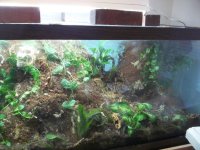
we let it dry for a few days and then started adding plants to it once we finished we added 4 frogs (would like to add more frogs also)
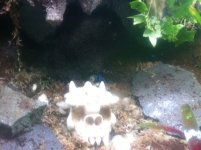
we still need to add a few things like the misting system,better top,just got new lights,and we were thinking isopods to help keep the system clean

any tips or ideas to add things let me know its a work in progress
i cant wait to start on my next tank
 

Attachments

  • IMG_1918.jpg
    IMG_1918.jpg
    163 KB · Views: 120
  • IMG_1919.jpg
    IMG_1919.jpg
    174.7 KB · Views: 115
  • IMG_1920.jpg
    IMG_1920.jpg
    158.1 KB · Views: 116
  • IMG_1917.jpg
    IMG_1917.jpg
    178.4 KB · Views: 116
some pics of construction
 

Attachments

  • IMG_1616.jpg
    IMG_1616.jpg
    134.3 KB · Views: 112
  • IMG_1620.jpg
    IMG_1620.jpg
    121.4 KB · Views: 120
  • IMG_1624.jpg
    IMG_1624.jpg
    146.6 KB · Views: 114
  • IMG_1886.jpg
    IMG_1886.jpg
    116.5 KB · Views: 121
some pics of the frogs
 

Attachments

  • IMG_1888.jpg
    IMG_1888.jpg
    198.2 KB · Views: 118
  • IMG_1607.jpg
    IMG_1607.jpg
    254.5 KB · Views: 113
  • IMG_1609.jpg
    IMG_1609.jpg
    242.8 KB · Views: 117
  • IMG_1889.jpg
    IMG_1889.jpg
    191.6 KB · Views: 117
Very nice! Excellent job on the set up. Thanks for sharing and adding the pics. My son is just getting in frogs and the pics will be great for him to check out.
 
it was alot of fun just takes time it took me 2-3 weeks to get to that point but most of the time is spent waiting for things to dry only a few hours of building
1:clean the tank
2:design on paper
3:seal tank
4:set base foam boards
5:set up foam boards
6:shape foam boards
7:cover in spray foam (let dry after each layer) 3-5 layers
8:fill in holes with spray foam and let dry
9:set up waterfall (optional not always recommended)
10:cover in coco husk and let each layer dry (this is a pain to get them all to stick still working on the husk to glue ratio)
11:added in slate,branches,vines,and cork bark
12:build up humidity (i let eveything set for a few days before this step)
13:add plants
14:add frogs
the frogs seem very happy but they only use a small area of the tank (right by that waterfall ) i only have 4 frogs and they are 9-10 months old (little bigger then a quarter) i plan on adding in another 4-8 frogs and about another 20 plants along with live moss
the picture is an upclose of the waterfall the only part the frogs really use so far
 

Attachments

  • IMG_1929.jpg
    IMG_1929.jpg
    153.7 KB · Views: 110
Mike,

Great detail and explanation. My son is 10 and currently has Pacman frogs but is looking into either dart frogs or Whites tree frogs as his next add on. He had a 2 hour delay for school this morning and spent that time reading here. He really liked the way you set your tank up and the pictures of how you got there. It was all much appreciated and the smile on his face as he read it said it all. he has quite a bit of reading and learning to go yet but that is the fun of it!!
 
its no problem i got most of the stuff to build it at home depot i would say almost $150 in stuff but thats everything
10 cans of spray foam (the cheapest one)
foam boards
glue (1gal bottle titebond)
tube of black silicon
tube of liquid nail
coco husk (petco eco earth 3 pack)
plexiglass lid
48in shop light
slate was collected outside and cleaned/steamed
cork bark,and vines was stuff i had
 
wow thank you but i will say this i did make a mistake with the lid i used plexiglass that was too thin and it bowed and 3 of the 4 frogs escaped (no chance in the reptile room)
im tearing down the whole lid and rebuilding it with glass
also going to rip out the waterfall and make it a bit smaller and build up more around it so they have more ground room
we moved the last frog into a new temp setup and will be selling him (want to make sure he still eats and everything just incase he got stressed out)
we will be going with banded lucs after the yellow and black with add more contrast and work better in larger groups
we also picked up about 30 more large clipping (various plants) to add to the tank the new pic should be up in 2 weeks when we finish it
 
here are the pictures of the new clippings and of the plants that were in the tank
the whole waterfall was torn out and everything resealed just need to finish the build again ill post more pics as i get closer to finishing
1st pic:clippings and the last of my frogs she seems to be doing great

2nd pic:doesnt look like it but about 20 plants both bins are over 20gal bins so alot of stuff to play with lol
 

Attachments

  • IMG_1941.jpg
    IMG_1941.jpg
    346 KB · Views: 101
  • IMG_1940.jpg
    IMG_1940.jpg
    237.1 KB · Views: 99
thats bound to happen, i had two leucs escape because i had pothos growing so much in my tank that it literally pushed the plastic part of the glass lid up a crack and they squeezed through.
 
well it sucks and a hard lesson to learn (sucks anytime an animal has to die for my mistake)
i finished the inside just waiting for everything to dry (i wait a few days)
then im going to start building the lid back up im going to use glass for the doors so no chance of bowing
i also fixed the 1st tank i built but i cant use it for lucs or tincs its more of a high setup so i dont know what to do with it lol
 
redone tank

let me go over the pictures cause somethings didnt work out well
the 1st and 2nd pic is the tank replanted and almost finished
the 3rd the waterfall didnt work well so we tryed a drip wall didnt work out well either so we just sealed it and planted over it
4th pic was setting up the waterfall/drip wall like i said it didnt work out well so we just covered it and planted over it
we still have to work on the top but we are trying to figure out how to build a lighting system into the top so we can just take it all off at once not in layers

on a side note next time ill be using a front opening tank the top or canopy is just too much of a pain

any questions about how we built just ask
any comments on what we could do better please comment always looking to learn new things
thanks mike
 

Attachments

  • 100_0061.jpg
    100_0061.jpg
    158.9 KB · Views: 46
  • 100_0062.jpg
    100_0062.jpg
    196 KB · Views: 48
  • IMG_1948.jpg
    IMG_1948.jpg
    156 KB · Views: 47
  • IMG_1944.jpg
    IMG_1944.jpg
    183.7 KB · Views: 53
Back
Top