mxracer4life
"Daniel Boone"
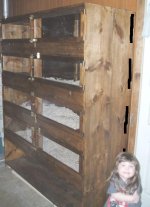
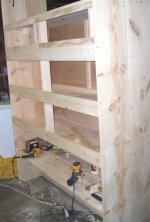
I finally got my cage done. Its been working out great. I will get more details on it later. Let me know what you think.
Last edited by a moderator:


")
Nice! What do you use to build the cage? I like that!
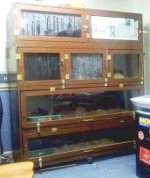
I'll count the holes in my boamasters when I get home. Once has appx 40 - 3/8th holes in the front and 12 - 3/8" x 3" slots in the back. The other just has the slots in the back. Both hold humidity well and seems to vent fine over the last month or so.
Sweet rack BTW Jeremy!
Yeah I get the same thing with the smell. I learned quick how much better they hold humidity too.
BTW, the inside of my boa masters are appx 46"x30"x12"
aquarium.